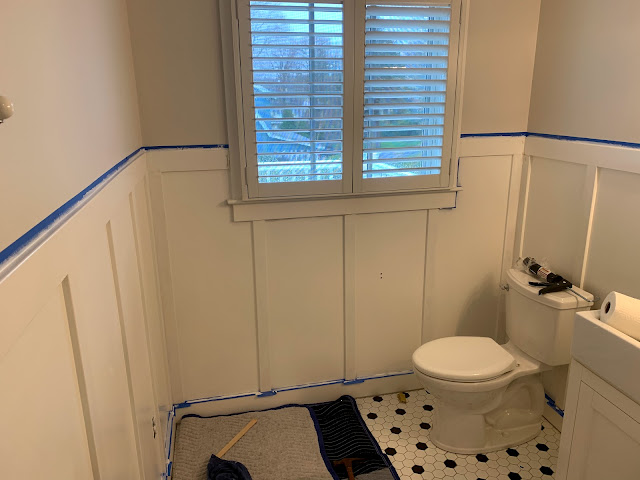
Ever since the beginning, I've wanted to added a little something extra to the upstairs hall bathroom. It always just felt like it needed something. I had originally planned to do some trim to the bathroom during the original installation but... you know... money. So naturally, it felt like the perfect project to take on in the midst of a global pandemic and quarantine.
All in, I would say this was an incredibly manageable project. Whenever people asked me how it went I would say that anyone who can measure could do this - and I stand by that. Before this project I had never painted a wall or used a nail gun. For sizing, I went with 2 1/2 inches for the stiles and 3 1/2 inches for the top line. I played with a bunch of different options but this felt the best to me. Pinterest is incredibly helpful in seeing different proportions play out.
What were the challenges:
- figuring out where all the stiles should go
- crooked house
- not having a miter saw
What could be better the next time:
- use a sander... and not elbow grease
- use a miter saw
- be more careful with the caulk
- pre-paint the wood before cutting + nailing to the wall
Overall, I'm really happy with this. It was a sub $200 project that I believe was going to cost me $1500 or so to have a professional do it and that didn't include painting.
To be clear, I am not the expert here... at all. I did a lot of googling and youtube video watching as part of this project. If you are looking for a step by step tutorial, check out what The Gold Hive has already documented. She is meticulous and a wonderful blogger. That being said, here is what I did.
Step 1 // Figured out the height and approximate stile placement. While not super important, it helped me determine how much wood I needed to order from Lowes. I chopped up used Whole Foods grocery bags to mimic stiles width for placement. (This made me feel crazy and like a mad scientist at times)
Step 2 // Painted the part of the wall that would become board and batten to match the trim. (This was the easiest part and I had never painted a wall before)
Step 3 // Placed the top piece of wood throughout the whole bathroom. Affixed it with the nail gun.
Step 4 // Measured and placed the individual stiles up. Each one was a different length. I cut sticky notes to be the exact width of the stiles and placed them on the top board so we knew exactly where each stile was going. This prevented a lot of second guessing and measuring.
Step 5 // Patched and filled the nail holes with wood glue. Sanded down. (This is tiring, and in hindsight I could have done a better job in a few spots)
Step 6 // Caulked everything. (I'm not good at this)
Step 7 // Painted everything. Had to touch up the top part of the wall where the paint chipped ... or I got sloppy painting.
Step 8 // Manically fuss about what shower curtain is best. But basically done.
All in, I think this project took 3 weeks but could have been done much faster if I paid attention to it. All the wood was up on the wall in two days... so the bulk of all that time was spent sanding, painting, etc.
Materials + Cost = $170 total
top line wood (3 1/2 inches) = $45
stiles wood (2 1/2 inches) = $69
Brad nail gun*
level
wood filler ($2)
spackling compound ($2)
sandpaper ($4)
paint ($20)
Caulk + Caulk gun ($13)
assorted paint brushes + spackle knives ($15)
*borrowed from dad


No comments
Post a Comment